


 |
| 1. Here is an older home that has cleaned up it's curb appeal and added some nice black accents that go well with the grey and blue door. |
 |
| I like that the owner's decided on a not so typical color for their front door. It is very welcoming, calming and makes me want to see the inside. I wouldn't suggest this color for a door if you are planning on selling as not everyone wants a blue door, but for living...I love it! |
 |
| 2. Here's another example of a homeowner being bold and choosing a different door color. I would add some planters with flowers and probably would have chosen a door color that goes with the exterior house color better... but, it's different. |
 |
| 3. I love the archway and the deep rich wood of the door. I would add a few more flowers to brighten it up. |
 |
| 4.This one has an interesting curved roof line and the nice arched doorway. |
 |
| 5. Here's a classic heritage style home. I like the big wide steps leading up to the door. The shrubs could use some cleaning up and as always...more flowers! |
 |
| 6. This yard is well taken care of and has a nice welcoming entrance with the hanging baskets and planters on either sides of the door. However, I would remove the trees that are blocking the front of the windows and plant them somewhere else. |
 |
| 7. This house has it all. Nice stone work, nice arched doorway and flowers. |
 |
| 8. I like the buttery color of this home. It goes well with the wooden door and white trim. It even has the flowers! |
 |
| 9. This is a house that I would want to see on the inside. It's hard to tell how the door is from the picture but it's a great entryway. |
 |
| 10. This home has potential for some great curb appeal. All it needs is some cleaning up around the shrubs. I like the detail around the door. See below for a close up of door. |

|
| www.BeStagedOrlando.com Be Staged...Be Sold! |

 |
| The walls are painted "Proper Gray" by Sherwin Williams and the ceiling is two-toned with Proper Gray and a shade lighter.  AFTER  |


 |
| Before |
 |
| After the addition of extra fabric and liner to make it longer, thicker and fuller |

 |
| This is the bed skirt that I sewed from scratch for only $6! The fabric matches the chair. |


 |
| To This.... |
 |
| The artwork above the bed is completely made of leftover wood and cotton batting from the head board and pieces of leftover fabric from the curtains. I think I brought a little Hollywood Glamour into this room...how about you? I love doing room makeovers! If you need help in any area of your home, yard or are planning on selling (staged homes sell faster), feel free to connect with me so we can talk about how I can make your life easier. www.BeStagedOrlando.com . |
 |
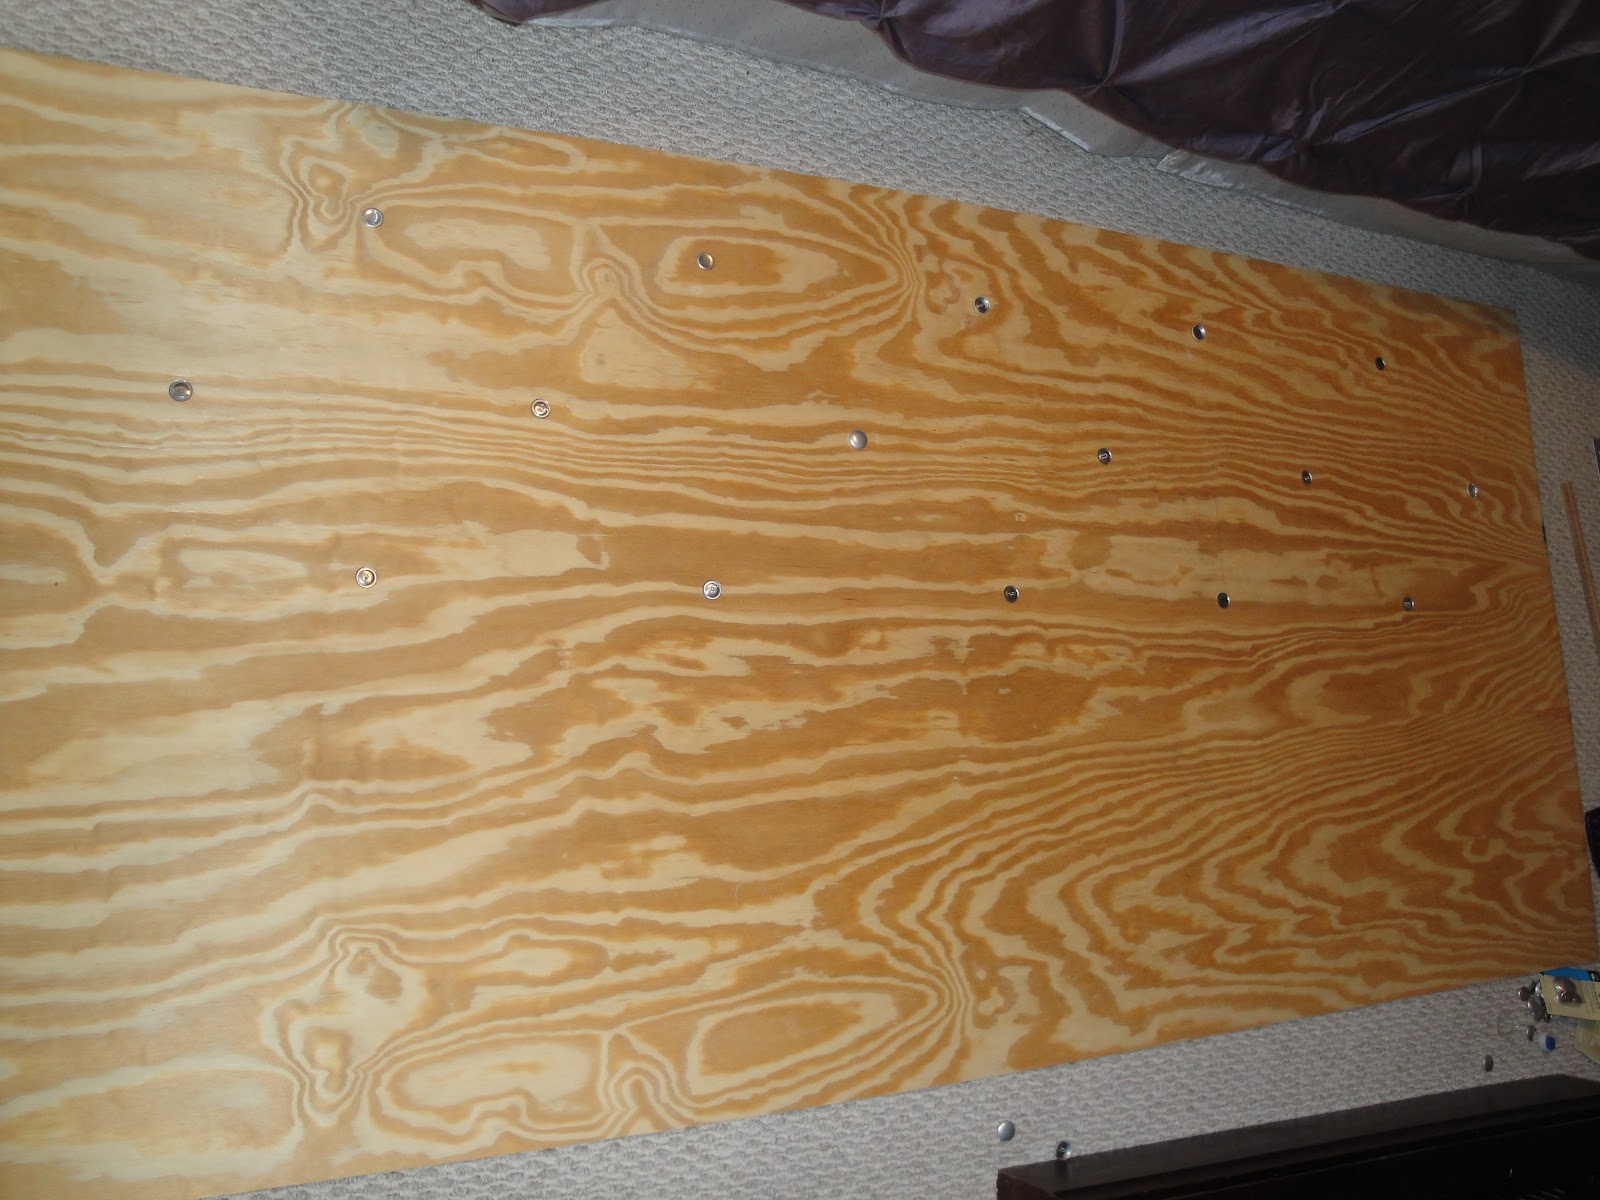
| Here are some supplies that I used. A ruler/tape measure, calculator and pencil (if you have decided to add the buttons to the front.) The button covers, a long upholstery needle, thick string or very strong thread, the plywood, 2" thick foam, cotton batting, fabric, staple gun and staples, spray adhesive. |


 |
| Here is the cotton spread out on the ground. The next step is to lay the board with the foam face down onto the cotton and then staple the cotton to the board. |
 |
| Here is the board with the cotton already stapled in place, ready for the black vinyl to be stapled. TIP: Make sure you remember to iron your fabric before stapling and if you use a vinyl, iron the fuzzy back side, NOT the front. |

 |
| Here is the headboard without buttons |
 |
| A picture of a button that I sewed by hand as my fabric was too thick. |
 |
Here's the back side of the button. The fabric is stitched onto the button cover.Now it was time to attach the buttons to the head board. I poked the upholstery needle through the hole and fabric and was very careful to push the needle through as straight as possible so I didn't mess up the mark that we measured out. Then we pulled the string as tight as possible and tied it around a nail to keep it from shifting. (That was Randy's clever idea, most people staple their thread to the board so it's up to you how you would like to secure the string.) This method worked very well for us. TIP: keep checking the front to make sure all your buttons are pushed in at the same distance so it looks uniform. It helps to cut all your string the same length so that they are all even. |

 |
| We used this picture hanger to hang the board on the wall and it works really well for us. |
 |
| Here is the front of the headboard mounted to the wall, yippee...it's done! |
 |
| All decorated and ready for a good nights sleep. I made the artwork above the bed with the leftover wood. For less than $100, we now have a classy headboard that is perfect for our new room. |
