Here is a step by step guide to how I made a customized headboard.
And when I say customized, it really is. A few months ago we upgraded from a queen bed to a new king sized mattress. And since my husband and I aren't very tall and didn't need the extra length, we ended up turning the mattress to make it even wider than a regular king size bed.
First thing was to measure the width of the mattress and add about an inch or two to each side. Our mattress was 80" wide, so we went to Home Depot to have them cut a piece of plywood that is 82" wide and 40" high. Some people recommend to get 1/2 thick plywood, but we decided on 1/4 inch plywood as we found it not to be too heavy on the wall, and thankfully ours also stays straight and doesn't buckle against the wall. Home Depot will make 2 cuts for you for free and I used the extra wood to create my own artwork above the bed so nothing was wasted.
 |
| Here are some supplies that I used. A ruler/tape measure, calculator and pencil (if you have decided to add the buttons to the front.) The button covers, a long upholstery needle, thick string or very strong thread, the plywood, 2" thick foam, cotton batting, fabric, staple gun and staples, spray adhesive. |
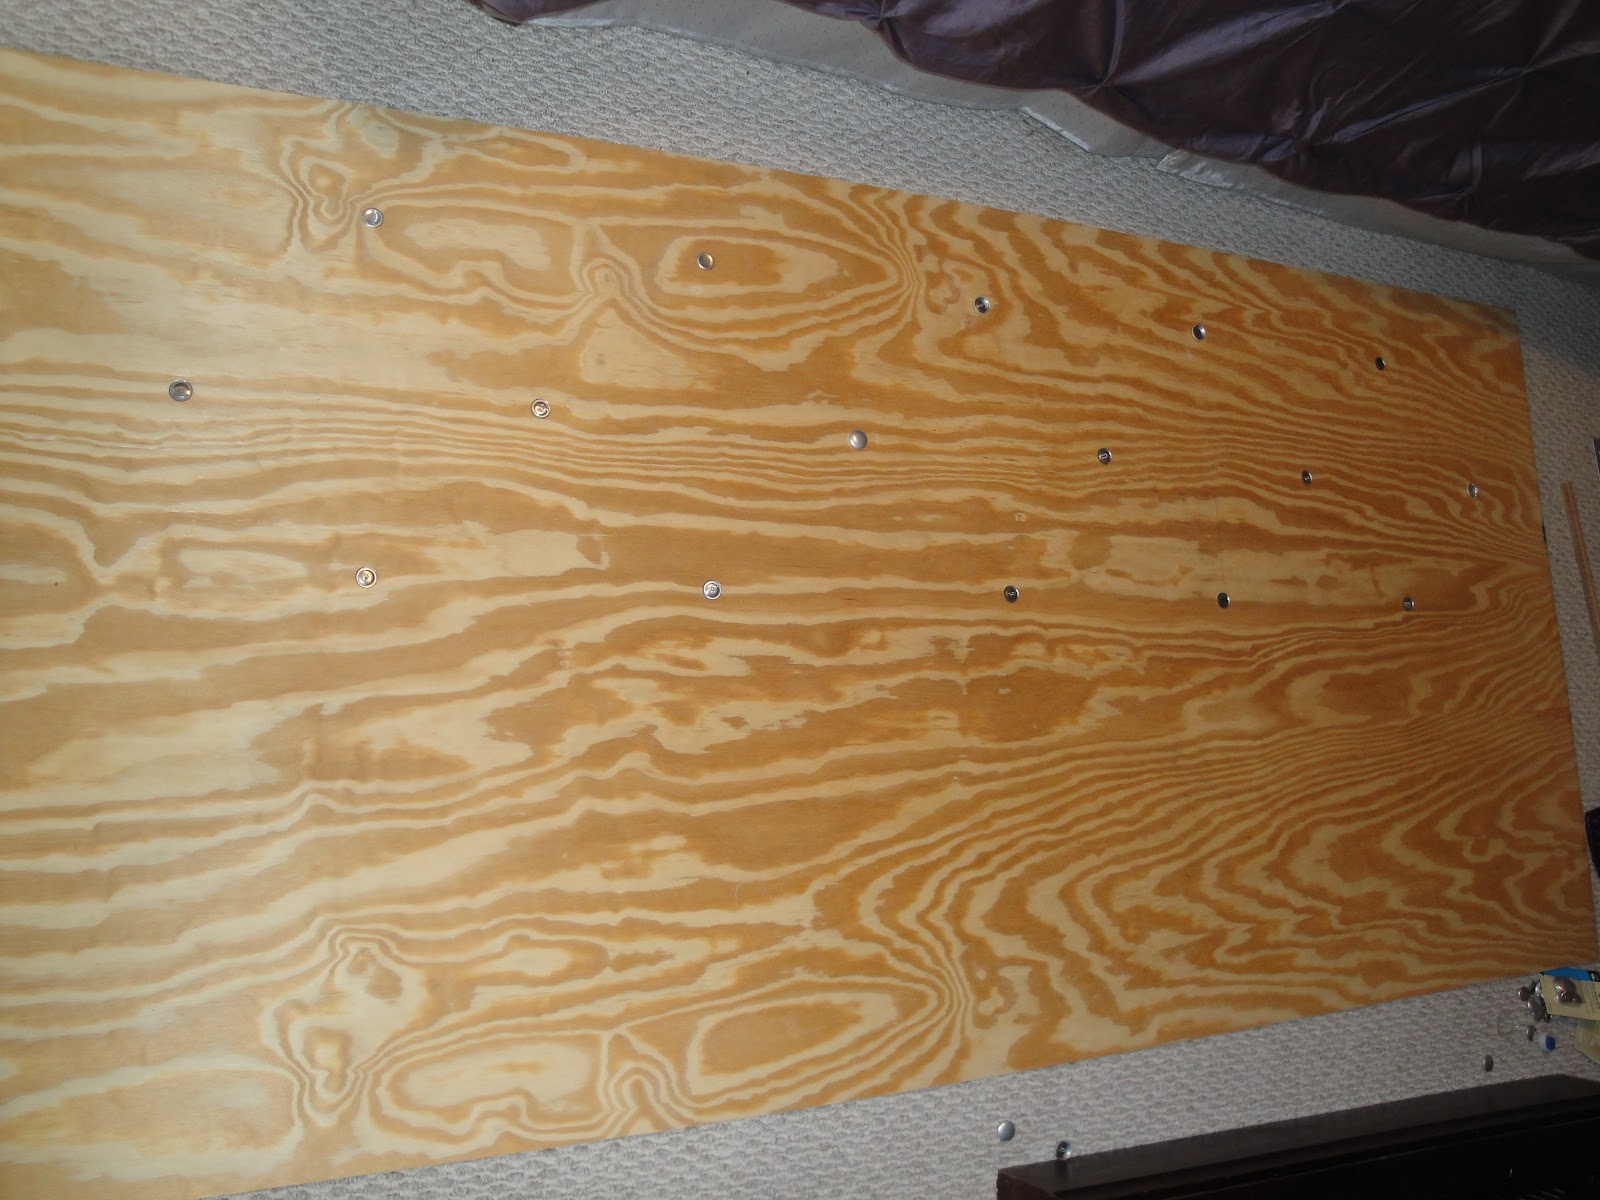
I knew that I wanted that classic tufted look, so the next step was to measure out (on the back side of the board) where I wanted my buttons to go once the fabric was stapled. That was probably the most time consuming as I had messed up the measurements (a couple times) but thankfully my husband Randy came to the rescue and fixed it for me. I planned for 3 rows of buttons, leaving nearly half of the bottom area blank as I knew I would have pillows and bedding covering up half the head board. Why waste your time adding extra buttons when you know you they won't be showing? The pattern that I decided to do has 5 holes on the top, then 6 for the middle and 5 for the lower row.
Once the holes were marked, we(well Randy) drilled a hole in each mark for the buttons.
Then, on the opposite or front side, I applied my 2" thick squares of foam padding that I bought at Joanne's. For my 82" wide headboard, I needed to buy 8 squares, luckily I found them on sale for 50% off. First, I laid it out on top of the board and cut it to size and then used spray adhesive to glue them to the board. This is so the foam won't shift around when flipping it over and attaching the fabric.
After that step, I covered the foam with a layer of cotton batting. This gives the head board a smooth look underneath the fabric.
 |
| Here is the cotton spread out on the ground. The next step is to lay the board with the foam face down onto the cotton and then staple the cotton to the board. |
 |
Here is the board with the cotton already stapled in place, ready for the black vinyl to be stapled.
TIP: Make sure you remember to iron your fabric before stapling and if you use a vinyl, iron the fuzzy back side, NOT the front. |
Then it was time to staple the fabric to the board. The fabric that I chose was a black vinyl that cost $6 a yard. (It took about 3 yards of fabric for my headboard.) When stapling, be sure to pull the fabric super tight and on a slight diagonal, starting in the center and working out towards. Keeping checking the front to make sure it looks OK, especially when you get to the corners as they can be challenging. I won't look very nice from the back but that doesn't matter anyway.
Once the fabric is on and stapled tight, you can end here and mount it to the wall, or continue on and add the buttons to create the tufted look.
 |
| Here is the headboard without buttons |
You need to get a long upholstery needle, button covers and some strong string or thicker thread. Once you have the buttons covered in the fabric,(this took me a lot of time as my fabric was thick and didn't want to stay on. I eventually had to hand sew the fabric to my button covers.) now you are ready to attach them to the front of the head board.
 |
| A picture of a button that I sewed by hand as my fabric was too thick. |
 |
Here's the back side of the button. The fabric is stitched onto the button cover.Now it was time to attach the buttons to the head board. I poked the upholstery needle through the hole and fabric and was very careful to push the needle through as straight as possible so I didn't mess up the mark that we measured out.
Then we pulled the string as tight as possible and tied it around a nail to keep it from shifting. (That was Randy's clever idea, most people staple their thread to the board so it's up to you how you would like to secure the string.) This method worked very well for us. TIP: keep checking the front to make sure all your buttons are pushed in at the same distance so it looks uniform. It helps to cut all your string the same length so that they are all even. |
 |
| We used this picture hanger to hang the board on the wall and it works really well for us. |
 |
| Here is the front of the headboard mounted to the wall, yippee...it's done! |
 |
All decorated and ready for a good nights sleep. I made the artwork above the bed with the leftover wood.
For less than $100, we now have a classy headboard that is perfect for our new room. |
www.BeStagedOrlando.com


Fantastic as always. When I buy a house I'm flying you up north so you can decorate everything while I watch :)
ReplyDeleteAmazing Kim. Great job!
ReplyDeleteThanks Janet, hurry up and get a house, I'll be waiting for my plane ticket.
ReplyDeleteThanks Kelly!
It looks beautiful....great details
ReplyDelete